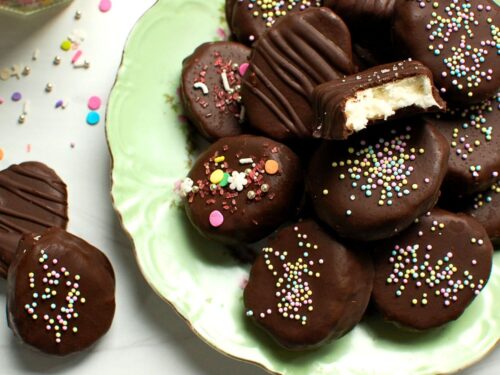
Some might say that, technically, rainbow sprinkle cake does not have much taste or flavor. But to me? It tastes like something close to joy. And who doesn’t need that? Here’s a pastry pro’s step-by-step guide to how to decorate a cake with sprinkles.
Rainbow Connection: How to Decorate a Cake With Sprinkles
If you’re looking for a cake that will bring joy to any birthday party, special occasion celebration, or maybe just a Tuesday, a cake with rainbow sprinkle decorations is the way to go. A rainbow sprinkle cake is not only colorful and festive, it’s also delicious and fun to make.
This article will guide you through the steps to create and decorate this delightful cake, including: 1) how to bake the cake layers, 2) how to make the buttercream frosting, and 3) how to assemble and decorate the cake with sprinkles — also known as jimmies in some places!
Like pretty cake decorations? Learn to make these candied flowers: an easy, gorgeous way to decorate a cake with real edible flowers.
1. Step one: Bake the Cake
Start with the baking your preferred cake, and make sure it is fully cooled. You can use any standard, 2-layer cake recipe you like. But for a cake decorated with rainbow sprinkles, I prefer chocolate cake, red velvet cake, or, in particular, this buttermilk sprinkle funfetti cake recipe.
In general, you will want two 9-inch or 8-inch cake layers. Eight-inch layers will give you more height, and 9-inch layers will give you more width. Make sure to grease your cake pans properly, and line the bottoms with parchment paper rounds.

2. Step two: Make the frosting
The buttercream or frosting is an essential part of making any sprinkle cake. For a good base to start decorating a cake with sprinkles, use classic vanilla buttercream frosting or Swiss buttercream. I actually prefer Swiss buttercream, as it will not develop skin once it’s been exposed to air and has a great flavor. But buttercream frosting, made with powdered sugar, is more simple.
For a simple buttercream frosting, you will need:
Ingredients:
- 1 cup unsalted butter, at room temperature
- 4 cups powdered sugar
- Scant 1/4 cup milk
- 1 teaspoon pure vanilla extract
- 1/4 teaspoon salt
Instructions:
- In a large bowl, beat the butter with an electric mixer until creamy and smooth.
- Add the powdered sugar, milk, vanilla extract, and salt to the bowl, and mix until everything is well combined and fluffy.
- If the frosting is too thick, add a little more milk, and if it’s too thin, add more powdered sugar.
- Cover the bowl with plastic wrap, and refrigerate the frosting until you’re ready to use it.
If you like this recipe, you’ll also love this recipe for sprinkle cookies.
How to Decorate a Cake With Rainbow Sprinkles (or Any Sprinkles!)
This lesson begins where your cake and buttercream recipes end. In other words, 1) bake and cool your cakes, and 2) make your buttercream.
Now we’ll pick up from there.

How to Stick Sprinkles to a Cake
There are different methods and hacks for how to stick sprinkles to a cake, including a very unstable method of rolling the entire cake on its side into sprinkles — yikes! But I believe the best method (and the professional method I learned for how you cover a buttercream cake with sprinkles) is to simply press them into the sides and top of the cake.
The first step to make a sprinkle cake: Stack, layer, and coat the cake with buttercream.
How to Layer and Coat a Cake With Buttercream
This article, How to Frost and Decorate a Cake, will take you through everything through to where the cake is layered with buttercream and the sides and top are coated with a crumb coat and top coat of buttercream.
I always use a cake stand to coat buttercream on a cake. I have an Ateco cake turntable, but this Wilton turntable is less expensive and will work very well.

Here’s the quick Cliff’s Notes version, though:
- First, make sure you have the right equipment: a cake smoother or comb; small and medium offset spatulas; cardboard cake rounds in the size of your cake pans; a cake turntable, such as this Ateco heavy-duty one (which pros use) or this less-expensive option; and, a long, serrated knife, like a bread knife.
- Slice the domed tops off the cake layers, and layer up with buttercream. Use the back of your large offset spatula to spread the frosting back and forth from the center, going just to the edge of the cake. Rotate the cake as you go. Add the second cake layer on top of the first, but place it upside-down on the buttercream, so that the bottom of the cake is on top. This creates a perfectly flat, relatively crumb-free top to your cake.
- Buttercream the sides and top of the cake using your offset spatulas and straight-edge cake smoother.
- Chill for at least 15 minutes, until the buttercream feels firm. If you are using confectioner’s sugar-based frosting, I recommend loosely draping the cake in plastic wrap so it does not form a skin.

Sprinkle Cake Decoration Next Steps: Sprinkle the Sides
So now you have your sweet buttercream-covered cake chilling in the refrigerator long enough to make the buttercream firm, but not so long that the cake itself gets cold. (Cold cake does not taste as good.) Now let’s get into how to make the sprinkle cake.
1. Set up your sprinkle station.
Put a clean, rimmed sheet pan on the countertop. This will catch the falling sprinkles. Fill a small bowl with about 1 1/2 cups of sprinkles. You may use less, but you’ll need extra.

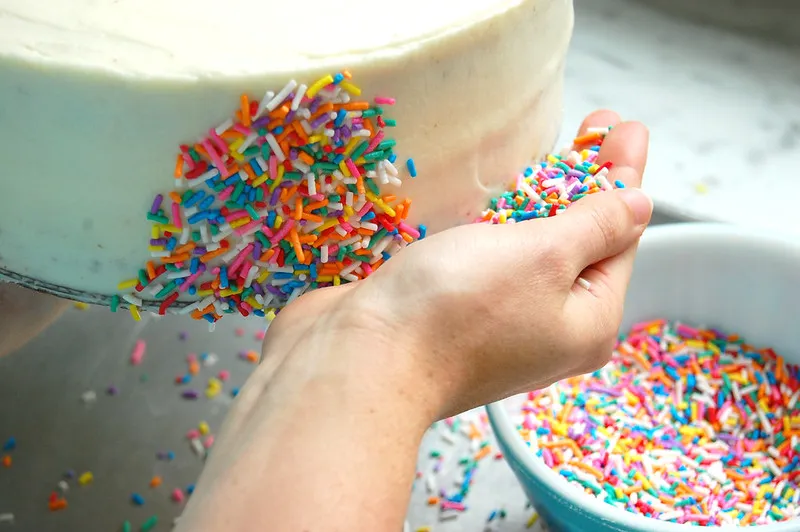
2. Take the chilled cake and balance it gently in your non-dominant hand.
Using your other hand, gather a handful of sprinkles and gently press them into the side of the cake, working from the base of the cake to the top edge, opening your palm as you go. Stop at the edge and don’t “round the corner” onto the top of the cake.
You want to keep those side edges sharp. Rotate the cake in your hand and repeat, going all the way around.
Gently pressing the sprinkles onto the cake is the reason the buttercream should be slightly firm. If the buttercream was very soft, you could end up with lots of dents in the cake. Firm buttercream keeps the straight sides and corners intact.
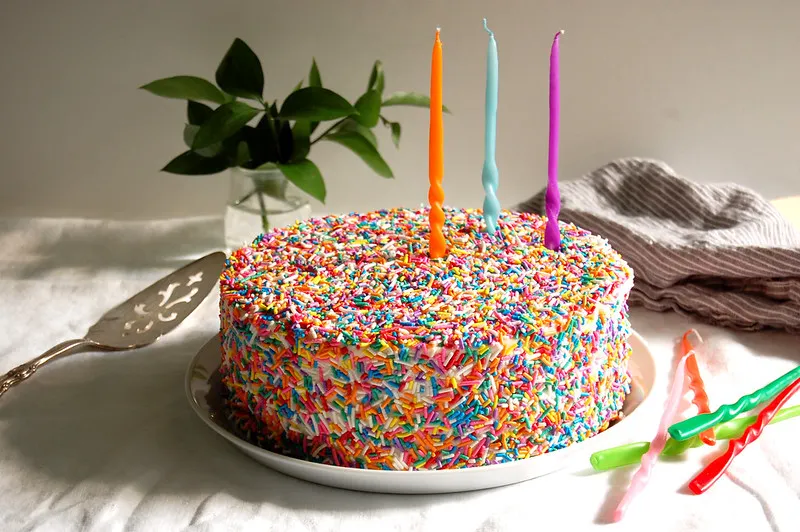
Rainbow Sprinkle Cake Decoration Final Steps: Cover the Top and Eat
3. Now, place the cake in the sheet pan.
The final steps to decorate a cake with sprinkles:
- Gather another large handful of rainbow sprinkles and pour a mound into the wide center of the cake.
- Use your hand to gently spread sprinkles over the remaining surface of the cake.
- Pour and spread more sprinkles as necessary to cover the bare spots.
You may not even want to cover the top of the cake, such as if you plan to write “Happy Birthday” on top. But I can’t help but love a cake fully covered in sprinkles for a birthday cake.

4. Take a look at the top and sides for any bare spots.
Any bare spots? Gently add some more sprinkles. Place the cake on a cake plate, and serve.
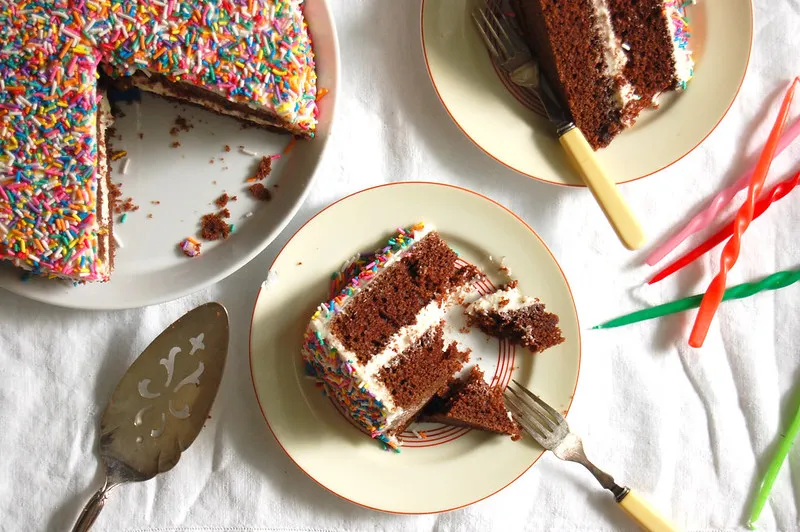
That’s it! Congratulations! You have learned how to decorate cake with sprinkles! Don’t worry if your rainbow sprinkle cake does not look perfect. It looks better than you think, and birthday cake decorating can be tricky.
If you liked learning to decorate a sprinkle cake, you’ll also like:

How to Decorate a Cake With Sprinkles
Ingredients
- 2 8-inch or 9-inch cake layers, baked and cooled
- 1 recipe buttercream, at room temperature
- 1 1/2 cups rainbow sprinkles, or sprinkles of choice
Instructions
For the Cake and Buttercream
- Bake and fully cool your preferred layer cake. I like red velvet or homemade funfetti cake.
- Make a batch of vanilla buttercream frosting or Swiss meringue buttercream.
- Set the bottom cake layer on a flat dish or (preferably) a cardboard cake round. Layer the cakes with buttercream and spread buttercream on the sides and top of the cake using your offset spatulas and straight-edge cake smoother. Use this guide to How to Layer and Buttercream a Layer Cake for a detailed step by step.
- Chill for at least 15 minutes, until the buttercream feels firm. PRO TIP: If you are using confectioner's sugar-based frosting, I recommend loosely draping the cake in plastic wrap so it does not form a skin. This will make the sprinkles harder to stick.
To Decorate the Cake With Sprinkles
- Set up your sprinkle station. Put a clean, rimmed half-sheet pan on the countertop. This will catch the falling sprinkles. Fill a small bowl with about 1 1/2 cups of sprinkles. You may use less, but you'll want extra.
- Press sprinkles by the handful all the way around the sides of the cake. Gather a handful of sprinkles and gently press them into the side of the cake, working from the base of the cake to the top edge, opening your palm as you go. Stop at the edge; don't "round the corner" onto the top of the cake, which will soften the crisp edges of buttercream. You want to keep those side edges sharp. Rotate the cake in your hand and repeat, going all the way around.PRO TIP: Gently pressing the sprinkles onto the cake is the reason the buttercream should be slightly firm. If the buttercream is too soft, you might end up with lots of dents in the cake. Firm buttercream keeps the straight sides and corners intact.PRO TIP: I often hold the cake with my left hand, and add sprinkles with the right. I find that getting the cake off the countertop gives me more space to work. To do this, you need to have the cake supported by a cardboard cake board or flat cake dish.
- Decorate the top of the cake with sprinkles, if desired. Gather another large handful of rainbow sprinkles and pour a mound into the wide center of the cake.Use your hand to gently spread sprinkles over the remaining surface of the cake.
- Check the cake for any bare spots. Spread more sprinkles as necessary to cover the bare spots. Serve.
Disclaimer: Nutrition information is provided for courtesy purposes only, and is an estimate not verified by medical or nutrition experts. Read the full nutrition disclaimer.


5 comments
JB
My sides definitely did not look as professional and straight as yours, but it was so much fun to do, and the directions were easy to follow. Thank you!
Julie
Dear Lisa,
I love this cake! I was wondering if I could make it in a 9 x 13 inch pan . I want to make squares to serve
as strawberry shortcake .
Thanks,
Julie
PS. I made the Swiss meringue buttercream— WOWZA!
Unpeeled
Hi, Julie! First of all: Good for you for going for the Swiss buttercream! I am so glad it turned out. I know it’s more work than frosting, but I really don’t think you can beat the flavor or fluffiness. As for the cake, yes. You can definitely use a 9×13″ pan. Sounds delicious. The baking time will be longer, of course, but just keep an eye until a tester comes out clean in the center. Happy baking!
Barbara
I made another sprinkle cake recipe and was disappointed in the frosting and the quality of the sprinkles. I am going to make this and then respond with a rating. Would you please recommend “really good quality sprinkles” for a cake like this? I would be so appreciative!!
Unpeeled
Hi, Barbara. Thanks for writing. Good question! Hmm…I think that the rainbow sprinkles I’ve come across are generally about the same. I don’t use anything special; whatever is in the supermarket will do! The main thing it to use the little oblong sprinkles (like the kind you’d get on a soft-serve ice cream cone) and not the tiny nonpareil balls, which will just get muddled in the batter and fully dissolve. Let me know how it turns out, and happy baking!