I scream, you scream for this stellar ice cream.
This very simple, homemade cookies and cream ice cream recipe takes minutes to prepare and makes the perfect summer dessert. To those not yet on the no-churn ice cream bandwagon, it’s time.

Meet This Homemade Cookies and Cream Ice Cream Recipe
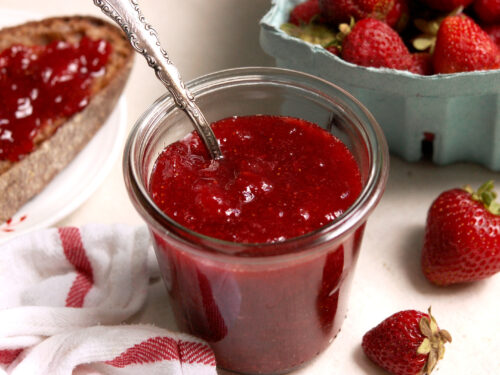
I fell in love with no-churn ice cream last summer, when I finally decided to test my jaded heart’s assumption that “real” ice cream required a “real” ice cream maker, plus ingredients like eggs, heavy cream, whole milk, and vanilla. I made a batch of no-churn strawberry ice cream, and was blown away by how authentic and creamy it was, with only three ingredients.
Now I am doubling down on the no-churn ice cream with this sweet homemade cookies and cream version. This sweet summer treat takes minutes to mix, and makes a creamy ice cream with extra chocolate cookie crunch.

How to Make Cookies + Cream Ice Cream Homemade Without an Ice Cream Maker
Traditional ice cream in an ice cream maker is made through the process of chilling and aerating an ice cream base at the same time until the right texture is formed.
No-churn ice cream works much the same way as traditional ice cream, except in two stages instead of one simultaneous process. No ice cream maker is needed; just a large bowl and a whisk. This makes it “no churn.”
First, you’ll whip the ice cream base of cream and sweetened condensed milk to soft peaks with vanilla extract and a pinch of salt. Then, fold in the Oreo cookie crumbles. The ice cream mixture next gets poured into a loaf pan and chilled in the freezer until cold.

Jump To:
What ice cream is the cookies and cream? Is it the same as Oreo ice cream?
Cookies and cream ice cream and Oreo ice cream are essentially the same thing. Strictly speaking, Oreo ice cream uses vanilla ice cream mixed with crushed Oreo cookies. (Pro tip: skip the Double Stuffed and other variations, and stick with the original.) Cookies and cream ice cream can be made with any chocolate wafer sandwich cookie, such as Hydrox or generic brands, or even plain chocolate wafers.
No matter which cookie brand you use, be sure that the chocolate cookie is crisp. It will absorb moisture from the ice cream base and become soft.

How to make this recipe
This is a very simple, straightforward recipe. To make your cookies n’ cream ice cream, you’ll need 1) a whisk, 2) a loaf pan, and 3) the ingredients. Freezing the whipped ice cream base stirred with the Oreo cookie chunks gives it the same texture as ice cream made with an ice cream maker.
Here are the recipe steps:
- First, whip the ice cream base of heavy cream and sweetened condensed milk to soft peaks with vanilla extract and a pinch of salt. I chill the bowl to keep the cream extra cold. This helps the cream whip better.
- Second, stir in the cookie crumbles.
- Pour the mixture into a freezer-safe container or loaf pan and chill in the freezer, covered with plastic wrap, until cold. Scoop and serve.
Serve with extra chocolate cookies, sprinkles, and whipped cream. This is a true low-effort, high-reward homemade ice cream, with perfect chocolate and vanilla flavor.

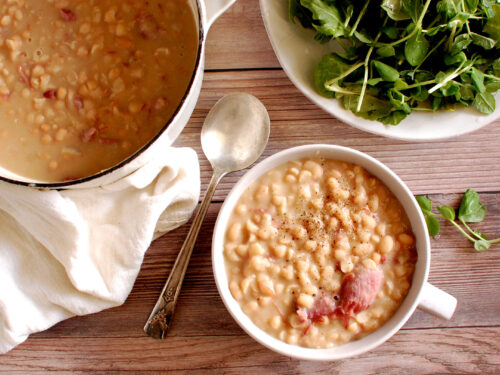
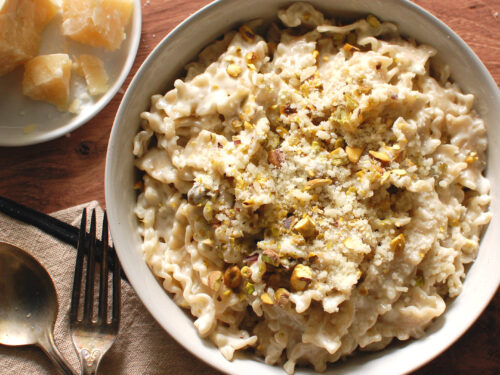
If you like cool summer desserts, you’ll also love:

Cookies and Cream Ice Cream (No Churn)
Ingredients
- 1 1/4 cup very cold heavy cream
- 2/3 cup sweetened condensed milk
- 1 tablespoon pure vanilla extract
- Pinch salt
- 18 chocolate and vanilla sandwich cookies (such as Oreo's), for about 2 cups of crumbs
Instructions
- In the bowl of an electric mixer fitted with a whisk attachment, or in a large chilled mixing bowl with a whisk, whip the heavy cream, sweetened condensed milk, vanilla extract, and salt to medium-soft peaks, about 5 minutes on medium-high. PRO TIP #1: Chill the mixing bowl. Cream whips better when kept as cold as possible. PRO TIP #2: You'll know you've hit medium-soft peaks when the peaks flop over immediately and don't hold their shape, and then spread ever so slightly. This creates the right amount of aeration, so the finished ice cream will be neither too airy nor too dense.
- While the cream mixture is whipping, pulse the cookies in a food processor until you have small- to medium-sized crumbles. If you don't have a food processor, place the cookies in a large baggie and crush them with a rolling pin or the bottom of a pot until you get small chunks.
- Use a spatula to gently stir most (but not all) of the cookie crumbles into the whipped cream ice cream base. Pour the ice cream mixture into a freezer-safe container or loaf pan and use the spatula to even out the top. Garnish the top of the ice cream with the remaining cookie crumbles.
- Cover with plastic wrap and freeze for at least 6 hours, or overnight. Scoop (this is my favorite ice cream scoop) and serve.
Nutrition
Disclaimer: Nutrition information is provided for courtesy purposes only, and is an estimate not verified by medical or nutrition experts. Read the full nutrition disclaimer.


2 comments
Ellabelle
I cannot get over how easy this is to make! It tastes great. Five stars.
F.M.
Consider me a convert. I was a little dubious of this but I had all the ingredients, so I thought, sure, why not? Well, it was absolutely delicious and it lasted only about 1 day in the freezer. I will make this again and again!!